









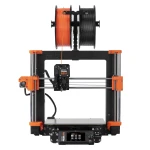
3D Printers
3D Printers for Professional and Creative Projects
At SignProduction, you will find 3D printers for businesses, schools, product development and creative projects. Turn digital designs into physical prototypes, models, custom components and finished items with machines from Bambu Lab, Creality, Prusa and Snapmaker.
Our range focuses on filament-based FDM 3D printers, which build objects layer by layer from heated plastic filament. Choose from compact models for smaller projects and printers with larger build areas, enclosed cabinets and automated features for more demanding work. Selected configurations also support multicolour printing.
The right machine depends on the size of your parts, the materials you want to use and your expected production volume. Explore our 3D printing filament and 3D print accessories to plan your setup.
Contact us on +44 2036300130 or by email if you need help choosing a 3D printer, suitable filament or equipment for your workshop.
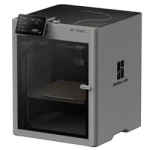
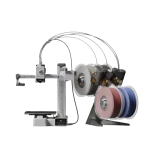
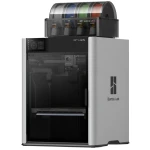
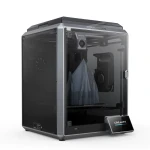
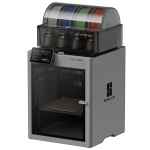
_1579227.webp "Cheap Snapmaker U1 - 3D Printer")
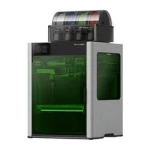
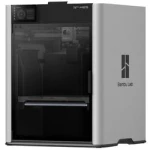

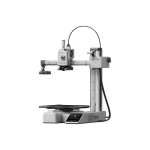
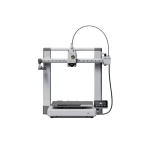
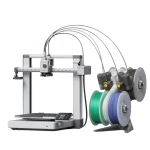
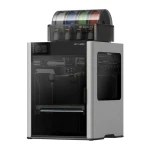
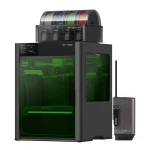
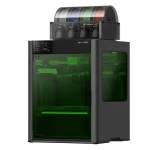
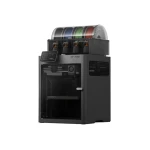
3D Printers for Prototyping, Production and Education
A 3D printer turns digital models into physical objects in your business, workshop, school or makerspace. It can produce prototypes, custom components, replacement parts, fixtures, sign elements and finished products without dedicated moulds.
At SignProduction, our FDM 3D printers cover different build sizes, material requirements and levels of automation. The range includes machines from Bambu Lab, Creality, Prusa and Snapmaker for beginners, creative users and businesses bringing suitable production tasks in-house.
Choosing a printer starts with the objects you intend to make. Consider their dimensions, required properties and production quantities before comparing maximum speed or machine size.
What Is FDM 3D Printing?
FDM stands for Fused Deposition Modeling. The printer heats plastic filament and feeds it through a nozzle, depositing successive layers onto a build plate until the object is complete.
Typical applications include:
- Prototypes for testing designs and dimensions
- Functional components and suitable replacement parts
- Holders, brackets, spacers and adapters
- Fixtures and workshop tools
- Architectural and educational models
- Sign letters and decorative elements
- Packaging samples and product mock-ups
- Robotics and electronics projects
- Personalised products and creative designs
- Small production runs and items made on demand
The finished part’s properties depend on the filament, design and print settings. Layer height, temperature, wall thickness, internal structure and printing orientation all influence the result.
Benefits of Bringing 3D Printing In-house
A 3D printer can shorten the journey from an idea to a physical sample. Instead of waiting for each design revision to be made externally, you can print, inspect and adjust suitable parts yourself.
Other advantages include:
- Flexible design changes, with dimensions and features adjusted in the digital model
- Production on demand, reducing the need to hold every component in stock
- Small-batch manufacturing without investing in dedicated moulds
- Custom shapes that may be difficult to make using conventional workshop methods
- Practical learning, connecting digital design with hands-on testing
- Individual personalisation for customer-specific products
3D printing does not replace every manufacturing process. It is particularly useful for prototypes, one-off items and smaller batches where adaptability matters more than the lowest possible cost per unit.
FDM Printing and Resin 3D Printing
FDM printers use filament and are widely used for prototypes, functional parts, larger models and everyday workshop projects. Material selection and the ability to adjust the internal structure make them versatile for many practical applications.
Resin 3D printers use liquid photopolymer that is hardened by light. They are often chosen for small objects with fine surface detail, such as miniature figures and jewellery models, and require a different material-handling and finishing process.
The printers discussed in this category use FDM technology. Resin 3D printing should not be confused with resin or latex inkjet printing for signs and graphics.
Choosing the Right Build Volume
The build volume describes the available printing space in width, depth and height. It determines how large an object can be printed in one piece, although supports, adhesion features and the selected configuration may reduce the space available for the model itself.
A compact printer can be sufficient for small prototypes, figures and classroom projects. A larger build area becomes useful for housings, architectural models, workshop fixtures or several smaller components arranged together.
Large products can also be divided into sections and assembled afterwards. This may allow you to use a smaller machine while choosing a suitable print orientation for each part.
Base your decision on the largest objects you expect to make regularly, rather than an occasional oversized project.
Open or Enclosed 3D Printer?
An open 3D printer provides easy access to the build plate and can work well with PLA and other materials that do not require a warm, tightly controlled printing environment.
An enclosed printer helps protect the print from draughts and temperature changes. This is particularly useful with materials such as ABS, which can shrink and warp as they cool.
Depending on its construction, an enclosure may also limit access to hot components, reduce some mechanical noise and help keep dust away from the printing area. However, an enclosed cabinet is not automatically an actively heated chamber.
An enclosure does not replace suitable ventilation. Follow the printer and filament manufacturers’ instructions when choosing the workspace and any ventilation or extraction arrangements.
Print Speed and Acceleration
A high advertised speed does not tell you how long every print will take. The machine must still produce the required shape, maintain material flow and form each layer correctly.
Actual production time depends on factors such as:
- Model dimensions and complexity
- Layer height and nozzle diameter
- The filament’s supported flow rate
- Acceleration and movement patterns
- Wall count and top and bottom layers
- Infill density
- Supports and material changes
- The required surface finish
Very high speeds may affect detail or introduce vibration if the printer, filament and settings are not well matched. A quick fit-check prototype and a visible finished product may therefore need different profiles.
Layer Height, Accuracy and Surface Finish
Layer height is the thickness of each printed layer. Smaller layers generally make stepped surfaces less visible, particularly on curves and slopes, but increase printing time.
Larger layers can be useful for quick prototypes and bigger objects where a fine finish is less important. The chosen layer height must remain suitable for the installed nozzle and the manufacturer’s recommended settings.
Dimensional accuracy also depends on the machine’s mechanics, calibration, filament and slicing profile. A fine layer setting alone does not guarantee that holes, mating surfaces or overall dimensions will be correct.
Nozzles and Nozzle Diameter
The nozzle diameter influences the width of the deposited lines and the level of detail the printer can reproduce. A nozzle around 0.4 mm is a common general-purpose choice.
Smaller nozzles can help with fine lettering and miniature features. Larger options can deposit more material and reduce printing time on suitable larger parts, provided the printer and filament can support the required flow.
Some filled or abrasive filaments require a wear-resistant nozzle. Check the material supplier’s recommendations rather than assuming that every standard nozzle can handle specialist blends.
After changing nozzle size, update the printer and slicer settings as required. Line width, layer height and flow must match the hardware being used.
Heated Build Plates and First-Layer Adhesion
A heated build plate helps suitable materials adhere during printing and can reduce lifting at the edges. The required temperature and surface depend on the filament.
A reliable first layer needs a clean, undamaged plate, an appropriate nozzle-to-bed distance and suitable temperature and speed settings. The printing surface must also be compatible with the material, including any recommended adhesive or release layer.
If the first layer does not hold, the object may shift, distort or detach later. Check adhesion before committing to a long print, and explore our 3D print accessories for supporting equipment.
Automatic Bed Levelling and Calibration
Automatic bed levelling measures the build surface and helps the printer compensate for small variations. It can simplify setup and improve first-layer consistency.
Depending on the model, other automated features may include nozzle-offset adjustment, vibration compensation, flow calibration and filament detection. Some printers also offer recovery features for selected interruptions.
These functions reduce manual work but do not remove the need for routine checks. The plate must remain clean, filament must feed correctly, and mechanical components still need maintenance.
Multicolour Printing and Material Changes
Selected printers support multicolour printing through compatible automatic filament systems or multiple print tools. These configurations can create lettering, logos, colour-coded components and decorative models without painting every detail afterwards.
Some setups also support combinations of materials or dedicated support filament. Compatibility depends on the printer, feeding system and materials involved, so different filament types should not be mixed simply because they fit on the machine.
Colour changes can add time and material consumption. Systems that share a nozzle may need to purge the previous colour, while other configurations use separate tools to handle changes differently.
Compare the complete package when buying. A standalone printer and its Combo version may include different material-handling equipment, and not every flexible or specialist filament is suitable for an automatic feeding system.
Preparing Models with Slicer Software
A digital model must be prepared in a slicer before it can be printed. This software divides the object into layers and generates instructions for the machine.
The slicer controls settings such as:
- Layer height and line width
- Nozzle and build-plate temperatures
- Speed and acceleration
- Walls, top layers and bottom layers
- Infill pattern and density
- Supports
- Model position and orientation
- Cooling
- Colour and material changes
Common model formats include STL, 3MF and OBJ, depending on the software. The resulting print file is transferred using a connection supported by the machine.
Start with a suitable printer and filament profile, then adjust it when the material or design requires something different. Check the preview and estimated time and material use before starting production.
Infill, Walls and Part Strength
Many FDM parts are not printed solid. Their internal structure, known as infill, supports the outer shell while reducing material consumption and printing time.
Strength depends on more than infill percentage. Wall count, top and bottom thickness, material, layer bonding and the direction of the applied load all matter.
Adding walls can sometimes be more useful than greatly increasing infill. For functional components, choose an orientation that avoids unnecessarily pulling the printed layers apart, and test the part under its intended conditions.
Supports and Model Orientation
Overhangs and sections that would otherwise begin in mid-air may need support structures. These are printed with the object and removed afterwards.
Changing the model’s orientation can reduce supports, improve the finish on visible surfaces and place the layers more favourably for strength. It can also shorten printing time and reduce waste.
Supports may leave marks where they touch the model. If appearance or access is important, consider splitting the object into sections and assembling it after printing.
PLA Filament for Models and Prototypes
PLA filament is a practical starting point for many users. It is generally straightforward to print and less prone to warping than several higher-temperature materials.
Typical uses include:
- Visual prototypes and concept models
- Architectural models
- Decorative objects
- Sign letters and display elements
- Classroom projects
- Light-duty fixtures used away from heat
Standard PLA has limited heat resistance and is generally less suitable for prolonged outdoor exposure. Check the specific filament’s properties against the environment in which the finished item will be used.
PETG Filament for Functional Parts
PETG filament combines relatively accessible printing with useful toughness and impact resistance. It is commonly chosen for holders, brackets, housings and practical workshop components.
Compared with PLA, PETG requires different temperature and slicing settings. It can also produce fine strands between sections of a model, known as stringing.
Dry material and a suitable temperature and retraction profile help improve the result. Choose the build surface carefully, as adhesion requirements differ between materials.
ABS Filament for Technical Components
ABS filament is used for functional parts where increased heat resistance and toughness are important.
It shrinks as it cools, which can cause corners to lift or layers to separate. An enclosed, temperature-stable printing environment is therefore beneficial.
Follow the filament manufacturer’s ventilation and handling instructions. ABS printing needs an appropriate workspace, not a poorly ventilated occupied room.
TPU Filament for Flexible Objects
TPU filament is used when a part needs to bend, cushion impacts or provide a softer contact surface.
Applications can include protective covers, feet, vibration-damping components, grips and flexible connections. Suitability depends on the material’s hardness and the demands placed on the finished part.
Flexible filament often needs slower printing and a well-controlled feeding path. Confirm compatibility with the extruder and any automatic material system before choosing a particular TPU grade.
Specialist Filaments and Decorative Finishes
Specialist filament can provide visual effects or properties that standard materials do not offer. Options may include silk-like finishes, glitter, translucency and colour-changing effects.
Some blends need a particular nozzle size, wear-resistant components or additional drying. Always check the recommended temperatures, speed, storage conditions and compatibility with material-changing systems.
Explore our full 3D printing filament range and choose the material according to both appearance and function.
Storing and Drying Filament
Filament can absorb moisture from the air. Depending on the material and its condition, this can cause popping during extrusion, rough surfaces, stringing and weaker layer bonding.
Keep spools in sealed storage with suitable desiccant, away from direct sunlight and large temperature changes. Some materials need closer moisture control than others.
Where drying is required, follow the filament manufacturer’s recommended temperature and duration, and check the spool’s heat tolerance. Dry storage helps prevent moisture uptake but does not necessarily restore an already damp spool.
3D Printing for Signmaking and Displays
For signmakers, 3D printing adds another way to produce shaped components and customised display details. It can be useful for work that does not start from a flat sheet.
Possible applications include:
- Raised letters and logos
- Spacers, mounting brackets and adapters
- Display stands and product holders
- Sign and interior-design prototypes
- Installation fixtures
- Suitable internal components for illuminated signs
- Customer-specific decorations and models
Printed parts can also be painted, covered with vinyl or combined with other graphics processes where compatible. Prepare the surface appropriately and consider heat, weather exposure and mechanical loads when choosing the material.
3D Printers for Businesses and Product Development
A physical prototype makes it easier to assess size, fit, ergonomics and function before committing to larger-scale manufacturing. Teams can compare alternatives and refine a design using real objects.
Businesses also use 3D printing for assembly fixtures, checking tools, temporary replacement parts, custom workshop aids and small batches of tailored components.
A printed object is not automatically equivalent to an original manufactured part. Safety-critical or heavily loaded components require appropriate design assessment, material selection and testing before use.
3D Printers for Schools and Makerspaces
3D printing brings together design, mathematics, technology and practical problem-solving. Students can create a digital model, manufacture it and assess how well it works.
Applications include STEM activities, architectural models, robotics, electronics projects, visual teaching aids and creative design. For shared spaces, straightforward setup and consistent material profiles can be as valuable as maximum speed.
Explore our makerspace equipment if you are planning a workshop that combines several technologies.
Establish clear procedures for supervision, approved materials, ventilation, hot surfaces and moving components. Position the equipment securely and control access during operation.
From 3D Scanning to a Printed Object
A model can be created in CAD software, obtained from a model library or developed from a 3D scan.
A 3D scanner captures the shape of a physical object for documentation, adaptation or further design work. The resulting data can provide a starting point for reproducing suitable shapes.
Scanning does not always produce a print-ready file. The model may need holes closed, surfaces repaired and dimensions or wall thicknesses checked before slicing.
Network Connections, Cameras and Remote Monitoring
Depending on the model, network functions can simplify sending jobs, checking progress and managing several printers. A built-in camera may also support remote viewing, time-lapse recordings or selected error-detection features.
These capabilities vary between machines and software packages. Check what is included and how the system fits your workplace.
Remote monitoring does not replace safe operation or appropriate supervision. Keep the printer on a stable, uncluttered surface and follow the manufacturer’s requirements for its surroundings and use.
Maintaining a 3D Printer
Routine maintenance helps preserve print quality and reduce avoidable interruptions. The schedule depends on the model, operating hours and materials.
Typical checks include:
- Cleaning the build surface
- Removing filament residue using the recommended procedure
- Inspecting the nozzle and hotend
- Checking belts and moving parts
- Cleaning fans and air inlets
- Inspecting the filament path and spool holder
- Applying specified lubrication only where instructed
- Keeping firmware and slicing profiles up to date
- Replacing worn components
Follow the manufacturer’s maintenance guide. Not every rail or mechanism should be lubricated, and unsuitable products can cause problems.
Troubleshooting Common 3D Printing Problems
The Print Does Not Stick
Check the plate’s cleanliness, material compatibility, levelling, nozzle distance and first-layer temperature and speed.
Corners Lift from the Plate
Review bed temperature, draughts, material shrinkage and whether the filament requires an enclosure.
Fine Strings Appear Between Features
Check moisture, nozzle temperature and retraction settings.
The Surface Looks Uneven
Inspect the filament, nozzle, flow settings and relevant mechanical components.
Layers Separate
Review temperature, cooling, material condition and print orientation. Keep adjustments within the filament’s recommended range.
The Nozzle Becomes Blocked
Check the material, temperature and possible residue in the hotend. Follow the printer’s approved clearing procedure.
Layers Shift Sideways
Inspect belts, possible obstructions and movement settings. Check whether the nozzle has caught on the printed part.
The Bottom Edge Spreads Out
This effect, often called elephant’s foot, can relate to first-layer settings, nozzle distance and bed temperature.
Overhangs Look Rough or Sag
Review cooling, speed, orientation and support placement.
Change one setting at a time where practical. This makes it easier to identify the cause and retain a reliable profile once the problem is resolved.
Finishing 3D Printed Parts
After printing, remove supports, adhesion brims and loose material using appropriate tools. Further work depends on the material and the intended appearance.
Finishing methods can include sanding, filling, priming, painting, assembly and the installation of suitable threaded inserts or other hardware. Some printed surfaces can also accept vinyl or other decorative finishes after preparation.
Check compatibility before using paints, adhesives or solvents, and test on a spare piece first. Follow the relevant product instructions and take suitable precautions for dust or fumes.
Choosing a 3D Printer for Your Work
Compare the complete working process rather than only the purchase price or advertised speed.
Useful questions include:
- What types of objects will you make?
- What build volume do you need regularly?
- Which filaments will you use?
- Do those materials require an enclosure or heated chamber?
- Will you need a wear-resistant nozzle?
- Is multicolour or multi-material printing important?
- Which automatic calibration features would save time?
- Do you need network access or camera monitoring?
- How much workspace and ventilation are available?
- Can you obtain compatible build plates and replacement parts?
- How much preparation and finishing will each job require?
- Will one printer meet the expected workload?
For beginners and schools, ease of setup and well-prepared profiles are often priorities. Regular business use also calls for attention to repeatability, maintenance and the availability of consumables.
Bambu Lab, Creality, Prusa and Snapmaker
Our range includes several approaches to desktop FDM printing.
Bambu Lab offers compact machines such as the A1 Mini, alongside models such as the A1, P2S and H2S. Compare the individual printers and Combo packages to establish which equipment is included.
The Creality K1 Max is another option for prototyping, practical components and creative production.
The Prusa MK4, supplied assembled, provides an alternative for development work, education and workshop projects.
The Snapmaker U1 is also part of the range for users exploring multicolour and multi-material production.
Check each product page for its build volume, enclosure, supported materials and included accessories. Features should not be assumed to apply across an entire brand.
Frequently Asked Questions About 3D Printers
Which 3D Printer Is Suitable for Beginners?
The Bambu Lab A1 Mini is a good choice for beginners thanks to its straightforward setup, automatic bed levelling and calibration features, which reduce manual adjustments. Its 180 × 180 × 180 mm build volume suits smaller models, prototypes and creative projects.
Start with PLA filament and a recommended material profile while learning the basics. If you expect to print larger objects regularly, consider the Bambu Lab A1 for its larger build area.
What Should a Business Prioritise?
Consider build volume, material compatibility, repeatability, maintenance and expected workload. Network functions, monitoring and access to replacement parts may also be valuable for regular production.
What Is the Difference Between PLA and PETG?
PLA is generally straightforward to print and suits visual models, prototypes and decorative work. PETG is often chosen for tougher functional parts, but needs different printing settings and careful attention to adhesion and stringing.
Does a 3D Printer Need an Enclosure?
Not always. PLA can normally be printed on an open machine, while ABS and some engineering materials benefit from a more temperature-stable environment. Follow the material and printer manufacturers’ guidance.
Can a 3D Printer Print Several Colours?
Selected configurations can change filament automatically or use multiple print tools. Check the complete package, supported materials and likely additional time and waste.
How Long Does a Print Take?
A print can take anything from minutes to several days. Size, geometry, layer height, speed, walls, infill, supports and material changes all affect the duration.
Can I Make Replacement Parts?
Yes, for suitable applications. Assess dimensions, loads, heat exposure and the consequences of failure rather than treating every printed part as an equivalent replacement.
Which Filament Is Suitable for Outdoor Use?
Choose according to sunlight, temperature, moisture and mechanical demands. Standard PLA is generally less suitable for prolonged outdoor use or elevated temperatures. Check the specific filament’s published properties.
Why Should Filament Be Kept Dry?
Moisture can interfere with extrusion and affect surface quality or layer bonding. The sensitivity varies by material, so follow the supplier’s storage and drying instructions.
Can I Leave a Printer Running Unattended?
Follow the manufacturer’s operating instructions and your workplace’s safety procedures. A printer contains hot and moving parts, and a camera is not a substitute for suitable supervision and safe positioning.
Filament, Build Plates and Accessories
Choose consumables that match the printer, material and intended use. Our 3D printing filament categories include PLA, PETG, ABS, TPU and specialist options.
You can also explore 3D print accessories and 3D build plates. Check model compatibility and surface requirements before ordering.
Planning Your Investment
Budget for more than the printer itself. Filament, optional material systems, replacement nozzles, build surfaces, storage equipment and workspace preparation can all affect the total cost.
Include time for model preparation, test prints, maintenance and finishing. For regular production, consider whether several smaller machines would fit the workload better than one larger printer.
A realistic budget connects the equipment to the work you expect to produce and allows for the supporting materials needed to keep it running.
Advice About Choosing a 3D Printer
At SignProduction, we can help you choose a 3D printer suited to your parts, materials and production requirements. Our guidance can cover build volume, enclosures, filament types, multicolour printing, build plates and accessories.
Contact us on +44 2036300130 or by email if you need advice or a quotation for business use, education, a makerspace or creative production.